This week's tutorial taught us how to use bones.
I had briefly covered the section earlier in this module, but did not use it for animation.
It is worth noting that whilst I am talking about bones I do not actually have any free animation or models to show my use of bones, this is because I found the area complex, and I struggled to make a model using bones. because of this, I will give a brief run through of how to use bones based on a tutorial that I found online. The tutorial can be found at the following link:
http://www.spoono.com/3ds/tutorials/tutorial.php?id=7.
First of all create the object that you wish to have bones, for example and arm or a leg.
Next, in your free animation you go to the command panel, click the create tab, then click systems and choose bones.
Then you choose your display window which shows the object that you wish to have bones. it is a good idea not to use to perspective view for this as a view such as left one right will be much easier.
click and drag to each of the bones that you wish to create, and clicking your notice that you are creating a chain -- to end this chain, right click. if you are creating a leg, you will need four bones, a hip, knee, ankle and toe bone.
currently if you tried moving any of the bones, you would find that they do not move correctly. To make them animate correctly we need to add a HI solver to the bones.
Select the animation menu choose IK solvers then HI solver. completely creation of the IK chain by selecting the top bone.
this should now have created a working bone. Try moving the middle bone to see if you get a reaction that looks realistic.
Thursday 19 February 2009
Saturday 14 February 2009
My future animations
This week was an important week because it was the week where I had to choose and design what my animations are going to look like when I create them.
to do this, I had to design a mood board, a short storyboard, and a research board.
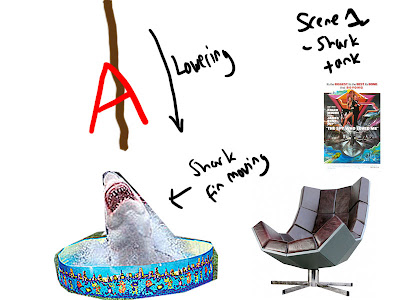
The first image, is my storyboard/research board for my first scene. The scene involves my channels at mascot being lowered into a shark tank by an evil villain.
 The second image is for scene two.
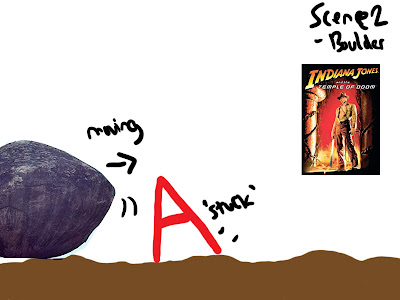
This scene is involves the mascot being hit by an Indiana Jones style rolling boulder.
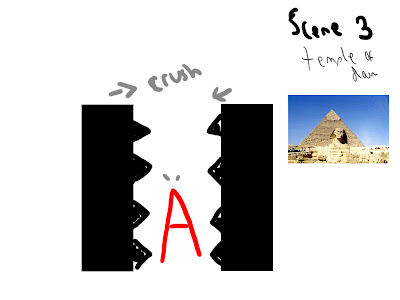
 The next image shows my final scene, which involves a mascot to being crushed in ancient Egyptian pyramid trap.
 My next image is my mood board, which shows off the mood feelings and sentiments of my animations.
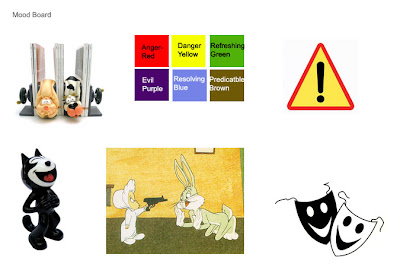 The mood board has a series of images on it. The first image on the top left hand side represents the common cartoon theory that when you squash something it retains its original form, the second image shows off a series of colours and what I imagine they depict on my scenes (Red shows anger, yellow is danger, green shows refreshing [ for something a little different], the purple shows evil [ representing what keeps happening to the mascot], the blue shows resolve, and the brown shows the sense of familiarity).
the warning symbol represents the thrill of danger to all my scenes, whilst the laughing cat shows what the audience's reaction should be, the Bugs Bunny cartoon shows the slapstick cartoon style violence which I will be using, and masks depict the genre of my animations (comedy).
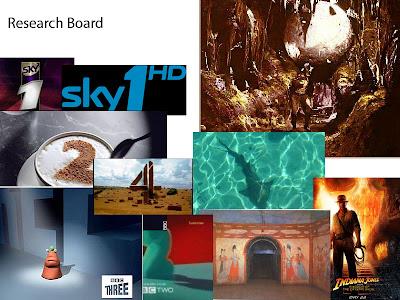
My final image is my research board, depicting what I found that when I looked at various idents, logos, and related areas to watch my TV channel of choice was offering (action).
 These boards will help me make my final animations.
to do this, I had to design a mood board, a short storyboard, and a research board.
The first image, is my storyboard/research board for my first scene. The scene involves my channels at mascot being lowered into a shark tank by an evil villain.
 The second image is for scene two.
This scene is involves the mascot being hit by an Indiana Jones style rolling boulder.
 The next image shows my final scene, which involves a mascot to being crushed in ancient Egyptian pyramid trap.
 My next image is my mood board, which shows off the mood feelings and sentiments of my animations.
 The mood board has a series of images on it. The first image on the top left hand side represents the common cartoon theory that when you squash something it retains its original form, the second image shows off a series of colours and what I imagine they depict on my scenes (Red shows anger, yellow is danger, green shows refreshing [ for something a little different], the purple shows evil [ representing what keeps happening to the mascot], the blue shows resolve, and the brown shows the sense of familiarity).
the warning symbol represents the thrill of danger to all my scenes, whilst the laughing cat shows what the audience's reaction should be, the Bugs Bunny cartoon shows the slapstick cartoon style violence which I will be using, and masks depict the genre of my animations (comedy).
My final image is my research board, depicting what I found that when I looked at various idents, logos, and related areas to watch my TV channel of choice was offering (action).
 These boards will help me make my final animations.
Thursday 5 February 2009
Animation Paths
In todays lecture we learned about creating animation paths which allow objects or cameras to move along.
First we simply started by creating a spherical shape, switching to 2d shapes afterwards and creating a single linear spline. From this, I then clicked on the animation button in the toolbar above the object displays and then chose constraints > path constraints. From here i then dragged my sphere to the line I created, which attached the object to the line (which was now converted to a linear path) and 3dsMax created a series of keyframes for me.
This functionality will be useful later on, as it will allow me to easily create motion between objects, rather than moving objectsd manually frame by frame.
Next we repeated the above process, however instead of connecting the shape to the spline, I added a camera, and attached it to the spline. This made the camera move which gives off the perspective of someone walking through or maybe a vehicle moving through a scene. Whilst we were assigned the task to create a walkthrough house, I had trouble getting the camera to stay looking at the area I wanted. I found that there is a myriad of options which need to be configured to do this, namely the "follow" checkbox on the right. The other options on this panel allow you to add banks, slow the camera down as well as many other complexed functions.
I produced an animtation of a camera roatating arfound a collection of 3d A shapes.
Subscribe to:
Posts (Atom)