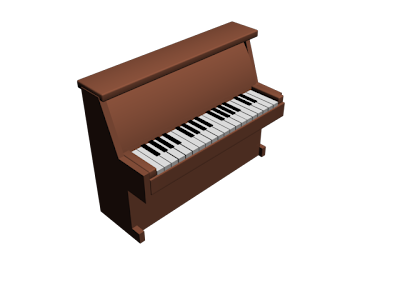
This was created by following a tutorial. Its worth nothing that this tutorial not only showed me the creation techniques for creating a piano but it introduced me to a new area in the materials editor, which has helped make my other scenes also, look more realistic.
The process of creating the piano is as follows:
1. Create outline of the piano end using the line tool
2. Extrude this line so that it becomes a 3d object and then duplicating it, spacing them apart to give the width of the piano
3. Next, I created a chamfer box which serves as the base of the piano and another one qhich serves as a base for the keyboard.
4. Next we created a single box, which then I duplicated to make the keyboard, creating a smaller box for on top to serve as the black keys.
5. After, we create another box, which serves as the top of the piano.
6. Finally we create another box to go between the keyboard and the top of the piano. This is first created as a normal box, and then the Bend modifer is applied to give it a curve making it appear more natural.
7. After this, we need to add textures and this is where I learned a new technique.
On the material editor panel I press the button marked as "standard". This then pens a new window up and I choose "Architectural". This then gives me a drop down list of pre-defined material styles, to which I can add either a bitmap or colour, and this gives the objects material the aterial properties of the chosen option. Most importantly, it makes light and reflections look much more realistic.
My finished piano is visible below:
 (LINK TO TUTORIAL: http://tutorial-zee.com/3d-studio-max-tutorials/3d-model-piano-studio-tutorial)
No comments:
Post a Comment