Tuesday, 5 May 2009

The Finale

The final post this semester sums up my work over both semesters, what Ive learnt, and of course showcases my final products this semester.

I started in September with absolutely no 3d experience other than having seen films in 3d at the cinema.
I started out by learning the basics, and built my knowledge from there.
Through a series of blog posts, I built a trio of scenes depicting different months. Looking back at these scenes now, knowing what I know now, I would have created something very different.
In January, we moved on to learnign how to make these scenes come to life through animation procsses.
Learnign a variety of tools, such as cameras, lighting and one of my avourite fucntions, the havoc engine, we weres et the task to create three animated idents for a TV channel of our choice.
Changign what I originally started with in March as my first scene came to life gave me the chance to use 3dsMax to my full potential, and gave me the chance to really see what i could create.
I used new material techniques, played with opacity and discovered the bomb function.
At the end of this process I a left with three scenes, each one differes in style, but each one ahs a similar theme - A rather unlucky company logo simply called "A", as thats what he is, getting involved in some kind of unfortunate action scene in an almsot movie style moment.

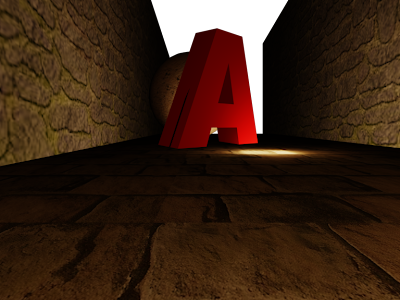
The first scene, titles "Temple Of Doom" is a throwback to the Indiana Jones film of the same name, simply involving a ball rolling and crushing the character.
Using the Havok engine, I was able to make a unqiue collision without having to create each frame individually.
The textures and ligting in this scene are my personal favourites, as they create the perfect moood and feel to the aniamtion.
If I was to recreate this aniamtion, I would work on making the hit feel more real, perhaps adding some crakcs to the A on the collision, and I would also work out what causes the mysterious line that appears in the side of the A.


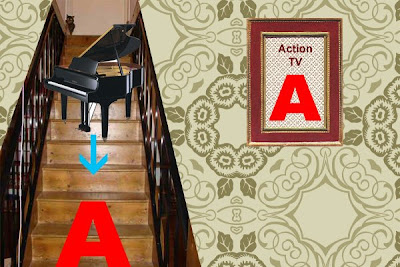
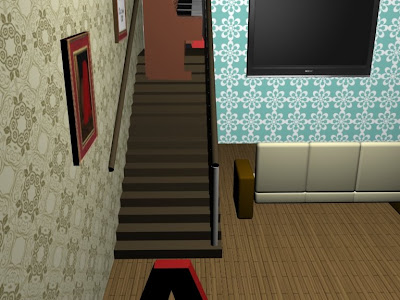
The second scene is titles "Piano Movers". It follows the comic cliche of a piano falling down the stairs and hitting someone. Obviously, in this scene, that somebody is the A character.
This scene involved the most work, as it used a lot of props, required manual animation, and also I ahd issues with the lighting. When cretaing this one, I also changed the camera several times to get a good feel for the scene.
If I was to recreate this scene, i would most likely try to improve the further, and also possibly try the Ink'n'Paint effect on this scene, to see how much it changes it.


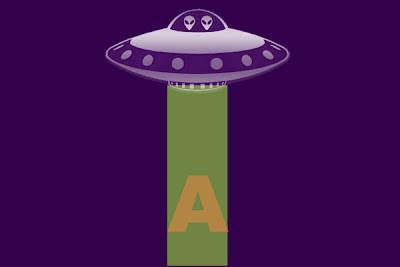
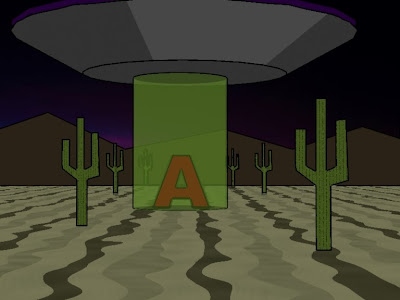
The final scene is named "Alien Abduction". Its a throwback to all those rather cheap and tacky feeling sci-fi movies, documentaries. etc.
The whole animation is suppsed to feel fake, and because of this, be comical.
Using an effect called Ink'N'Paint, I was able to create this unique and unusual look, and it almost feels comic book like.
This is my favourite scene, as it is what feels my most unique.
If I was to change this scene, I think I would add perhaps some string in to make everything look even more prop like, as well as finding ways to enchance the Ink'N'Paint effect further.


Overal, looking back over the last year, it feels like I have gone on quite a journey through the basics of 3dsmax, and I have enjoyed it. I have found it chalenging, and at times I have felt like quiting from it completely, but I feel now that I am capable to going to the next level and evloving my knowledge with this piece of software further.

Wednesday, 29 April 2009

Alien Abduction

After a long render process (around 60 minutes), my scene was complete.
To this, I added a soundtrack usign Premiere pro. I had difficulty choosing a good soundtrack, and settled on a track titled "No More Dead Heroes" fro the Halo video game, as it seemed to set the mood, give a bass frequency suitable to a hoverign UFO and even a traction beam sound.
The completed scene is unique comapred to my other two for several reasons, these are:
  • No Bitmaps as textures
  • Ink N Paint applied to every surface
  • No Lighting
  • Undetailed, flat props
However by not having these features, it worked in achieveing an eye catching visual, which seems to fair well with people who see the ident.
The finished scene is shown below:

Wednesday, 22 April 2009

Textures and props for the "UFO"

Whilst playing with textures for my alien scene, I discovered an excellent function called Ink n Paint.
This basically applys a comic effect to your 3d models, and I thought it would be a great addition to my UFO scene.
Rater than aim for a realistic design, I could use ink'n'paint to give it a fake style reminiscent of 1950's sci-fi.
To sue this function, you simply click "standard" on the materials box. This brings up a panel from this you choose Ink'n'Paint.
After this you chosoe the colour of the face and its shadow (typically grey, or a darker varient of your first colour).
This is then applied to your shape.
Following this new found effect, and also new direction for the scene, i decided to make the scenery appear fake.
To achieve this, I created a cactus outline, and extruded it. Whilst the objects 3D it feels flat, fake and almost 2d.
This then had the ink'n'paint effect added to it, additionally with a marble texture, creating a stripey cactus style look.
Adding to the scene, i created some fake mountain ranges t go at the far back of the scene, giving the vision of a false horizon, and also added a rather flat billboard. The billboard was important to the cene as it was to be the focus point of the camera after the A mascot had been abducted. The billboard is to show the compnies logo, informing the viewer of what they are watching.
I then applied a marble effect to the ground combined with ink'n'paint, whcih gave the ground a more cartoonish desert feel.
Below is a screenshot of how it rendered:
The scene at this stage was finished, excluding the need to add in a soundtrack.

Thursday, 16 April 2009

Space Scene

Having previously built the space ship, I needed to make a scene for it to go into.
The most suitable idea was to use a desert scene, as this seems to be the most commonly associated place with aliens (think Roswell, Area 51 etc.)
I started with one flat plane. This was to serves as the desert floor, and I stretched this out far so that it would look expansive like the desert.
After this, i added my A character to the scene, and imported the UFO. I then animated the spaceship flying in, using simple animation, with the UFO hovering above the A shape momentarily before zooming off.
Once I had done this animation, i created a cylinder and coloured it green, and changed its opacity to 50% making it translucent.
I then animated this growing downwards from the spaceship engulfing the A shape, an then retracting back up towards the spaceship - thus giving the effect that it was begin beamed from the spaceship.
I then animated the A floating upwards during this beams animation sequence. To do this I used the auto key tool, starting with it simply moving up into the spaceship, and then adding random rotations during this process to give it a more natural feel.
The animation at this stage is shown below:
It is worth noting a few things at this stage:
Currently, the textures are poor, mainly because I am unsure how to evolve them to make them look realistic, secndly, theres a very poor backdrop image and finally, the scene feels empty, as it lacks visual content. This will be all addressed in the following week.

Tuesday, 14 April 2009

The Piano Falling scene

After much work, and using many new effects shown below I finally created my piano falling down the stairs scene.
This scene lasts for 15 seconds, and involves a combination of jazz music overlaid on itself so that would sound more like a piano falling.
The scene uses one camera which rotates to give the best view of the piano throughout.
The textures are the combination of the architectural ones used in the piano tutorial, and basic images overlaid (wallpaper for example).
The final animation is shown below:

Sunday, 12 April 2009

Lighting up your home

The piano falling scene, was in my opinion the most akward scene to light. The main reason for it being so award is that I did not design any windows so there was no way of natural light coming in from the sides, therefore the scene relied soley on lighting from above.
After trying many options, all of which gave me light which created horrible shadows, ruining the scene, I found the perfect light setting.
The light settign which worked for me was a simple "omni light" with a standard multiplier of 1 and a far attenuation of 80 - 200. The shadow density settings are set to 1, which is low, but still creates a slight shadow.

Friday, 10 April 2009

The piano goes crash

Originally, the piano was going to fall down the stairs, and it would just stop off of camera. The main reason for this, was that I didn't know how to make it do much else. This however changed, when I learnt about the bomb function in 3dsMax.
Following a tutorial I found online from http://www.spoono.com/3ds/tutorials/tutorial.php?id=2 I was able to make the piano explode into small fragments on impact with the wall. By playing further with the bomb settings, i was able to make the wall crack very slightly on impact with piano to add a final touch of realism.
The outcome of the bomb effect is shown below in the screenshot.

Monday, 6 April 2009

Home.

The piano scene is the scene which requires the most scenery in my opinion, and because of this, i feel that it took the longest.
Initially, i started with a plane for the floor, and three boxes creating a U shape, in which a living room would sit. I then added some wallpaper style texture to give it a room feel from the start so that I would be able to build a living room from it.

I then imported the staircase into the scene, along with the piano which I placed that the top of the stairs.
I then created a sofa, by combining several boxes, some of which were created from chamfer boxes as well, to give them sofa a more natural look.
Additionally, I added picture frames to the staircase, contianing images relating to the previous aniamtions and also added a TV to the wall, making it feel like a TV set.
I then began the animation process, which involved moving the piano from the top of the stairs to the bottem. Initially, I sued the auto key mode to make the pianon move to the stair bottem, but afterwards I had to go an individually edit each frame to give the piano a bumpy action.
Below are some shots of various parts to the scene.


The scene overal

The sofa, staircase and piano falling

The living room area


Friday, 3 April 2009

Building a staicase

To create a staircase for the piano falling down scene, I started with one single box, and then duplicated this. Using the snaps toggle mode, I was able to create the steps very quickly without hassle. After selecting the snaps option, I held the shift key and dragged the duplicate box to the new position it then portended me asking whether I wanted to create more than one, which I adjusted to my number of steps. This then created my steps.
To add a Bannister, I created a pole out of a cylinder, and duplicated it using the process above.
I then created a rail out of another cylinder.
The staircase creation process is shown below:

Wednesday, 1 April 2009

Spaceship

To create a UFO for my alien scene, I chose to use 2 cylinders. I initially created one, converted it to an editable poly, and extruded the edges inwards, creating a saucer shape.
This shape was then duplicated, and placed on the top of the other shape, creating a flying sucer shape. The upper half of the saucer was adjusted to make it slightly taller, so that the UFO looked a more like a cartoon one.
Below is the result of this process (note that the image has not yet had textures applied to it):
T

Monday, 23 March 2009

The temple of doom

After adding music, changing the brightness settings and adjusting the colour slightly using Sony Vegas Pro I created my finished product for my first ident.
The video shown here is at a lower quality because of size restrictions (the full quality one is 400mb).
The soundtrack chosen coems from the game Halo, and is named "delta halo suite". The tune is an atmosheric one, helping creating a dark, dingy and cold atmosphere.
The scene is made up of a plain for the floor, a 3d letter A, two boxes forming the walls and a large sphere. The sphere has a fair amount of weight added to it so that the reactor engine would create an action that topples the A shape. The rest of this scene is composed of a light (shining from the oint of view of the camera) and a set of textures.

Tuesday, 17 March 2009

Piano.

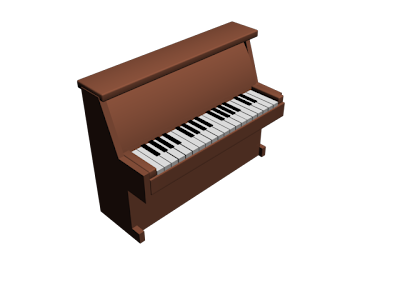
For my second scene in which a Piano comes crashing down the stairs, it was important to start by creating the most important object for this scene, the Piano.
This was created by following a tutorial. Its worth nothing that this tutorial not only showed me the creation techniques for creating a piano but it introduced me to a new area in the materials editor, which has helped make my other scenes also, look more realistic.
The process of creating the piano is as follows:
1. Create outline of the piano end using the line tool
2. Extrude this line so that it becomes a 3d object and then duplicating it, spacing them apart to give the width of the piano
3. Next, I created a chamfer box which serves as the base of the piano and another one qhich serves as a base for the keyboard.
4. Next we created a single box, which then I duplicated to make the keyboard, creating a smaller box for on top to serve as the black keys.
5. After, we create another box, which serves as the top of the piano.
6. Finally we create another box to go between the keyboard and the top of the piano. This is first created as a normal box, and then the Bend modifer is applied to give it a curve making it appear more natural.
7. After this, we need to add textures and this is where I learned a new technique.
On the material editor panel I press the button marked as "standard". This then pens a new window up and I choose "Architectural". This then gives me a drop down list of pre-defined material styles, to which I can add either a bitmap or colour, and this gives the objects material the aterial properties of the chosen option. Most importantly, it makes light and reflections look much more realistic.
My finished piano is visible below:

(LINK TO TUTORIAL: http://tutorial-zee.com/3d-studio-max-tutorials/3d-model-piano-studio-tutorial)

Sunday, 15 March 2009

Creating scene 1 part 2, "The temple of doom"

Previously in creating this scene, I ran itno some problems regarding the letter being rendered as completely opaque.
This issue was fixed after many attempts at finding out what the problem was.
The problem was solved by changing the letter A's properties in the rigid body properties box. To fix it, I had to check the box marked "unyielding" and also set the geometry to "concave mesh".
After this, the A was no long opaque.
Continuing from this stage, I added walls to the model, and introduced new textures to the objects to make them feel more realistic.
I then added lighting in two places with an orange glow to give the model the feeling of being in a narrow passageway.
A video can be found below. This video is the render output of this scene.

Friday, 6 March 2009

Changes to the animations

During the process of creating my first animation, it came apparent to me that my original three ideas would not work too well with what knowledge I had for 3dsmax.
Because of this, I felt it necessary to head back to the drawing board and to redesign the ideas for the other too images. Also, I feel by changing them I have given my idents a little variety.
Below is the new mock up designs for my two images.

Alien Abduction
This scene involves a spaceship abducting the letter A. The camera will then continue along a path and finish on a billboard with the company's logo on it.
The scenes design will also feature a more unrealistic, cartoony feel material wise, this is to aid to idea of aliens abducting the tv's main character.


Piano Movers
This scene involves a piano being pushed down a set of stairs, and hitting the character pushing him against the wall. The camera will then move to focus on a wall painting of the companies logo. The textures I will use in this scene will involve more 'homely' textures.


Creating scene 1 part 1, "The temple of doom"

This scenes purpose is to mimic a very famous scene from the film series "Indiana Jones".
To create this scene I planned to use the reactor engine, so that the ball would look realistic when it hits the A.
Firstly, I created the A, a plane with a slight tilt, and a ball.
Using the reactor engine, I gave the objects mass and chose which ones would not react. I then built the animation from the reactor engine, taking it into the standard animation system for 3dsMax, and I added in my camera.
As you can see, from below, the basic animation is visible but theres a number of rather prominent problems, namely the letter A being transparent.


Sunday, 1 March 2009

Reactor (Using the havok engine)

The reactor engine is a very powerful function of 3DSmax.
it allows us to animate car crashes, blocks being hit by balls, realistic tablecloths, and water. It is also possible to animate realistic looking ropes, car movements, an object that break into small pieces when hit or dropped.
to create a simple scene in which a ball hits a few blocks, create a plane, then a sphere (which must hover above the plane, not actually touching) and two cubes (once again making sure they do not touch).
rotates the plane slightly so that it slopes downhill towards the boxes.
next go to the animate menu and choose reactor from the bottom. From the reactor menu choose crate object and select rigid body collection. This will then give you a circle with free boxes in it. This is your rigid body collection just move it somewhere safe in your scene.
You'll notice that on clicking any rigid body collection, but information about it has appeared on the right-hand side under the modify tab. you must now select items to be in this rigid body -- Tick the pig button and select your objects alternately click the add button if you have a lot of objects.
It is important that all objects that you wish to be involved with animation in this rigid body collection.
Next return to the reactor menu and this time choose open property editor. Click on your plane firstly give it a mass of Zero and take the inactive box. Also under simulation geometry click concave mesh.
Next click on the sphere, give this a mass of 100, a friction of 0.3 and choose concave mesh once again under simulation geometry. Finally click on each of your boxes and give them a mass of 0.2 and chooses concave mesh again.
Next return to the reactor menu and click preview animation. You should now have a working animation, if not have a look to make sure that you have followed my advice above.
If you have an animation that you're happy with, choose the create animation button. This is an irreversible process to ensure that you have a backup saved before clicking this button.
An example of a working reactor animation is shown below (this also shows part of one of my scenes that I have been creating).


Thursday, 19 February 2009

Bones

This week's tutorial taught us how to use bones.
I had briefly covered the section earlier in this module, but did not use it for animation.
It is worth noting that whilst I am talking about bones I do not actually have any free animation or models to show my use of bones, this is because I found the area complex, and I struggled to make a model using bones. because of this, I will give a brief run through of how to use bones based on a tutorial that I found online. The tutorial can be found at the following link:
http://www.spoono.com/3ds/tutorials/tutorial.php?id=7.
First of all create the object that you wish to have bones, for example and arm or a leg.
Next, in your free animation you go to the command panel, click the create tab, then click systems and choose bones.
Then you choose your display window which shows the object that you wish to have bones. it is a good idea not to use to perspective view for this as a view such as left one right will be much easier.
click and drag to each of the bones that you wish to create, and clicking your notice that you are creating a chain -- to end this chain, right click. if you are creating a leg, you will need four bones, a hip, knee, ankle and toe bone.
currently if you tried moving any of the bones, you would find that they do not move correctly. To make them animate correctly we need to add a HI solver to the bones.
Select the animation menu choose IK solvers then HI solver. completely creation of the IK chain by selecting the top bone.
this should now have created a working bone. Try moving the middle bone to see if you get a reaction that looks realistic.

Saturday, 14 February 2009

My future animations

This week was an important week because it was the week where I had to choose and design what my animations are going to look like when I create them.
to do this, I had to design a mood board, a short storyboard, and a research board.
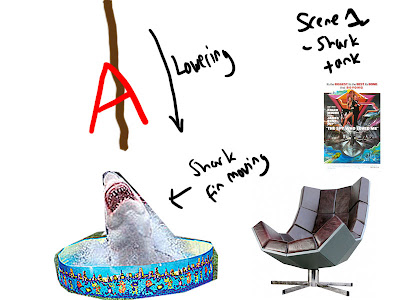
The first image, is my storyboard/research board for my first scene. The scene involves my channels at mascot being lowered into a shark tank by an evil villain.
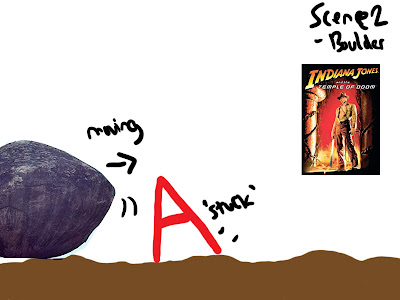
The second image is for scene two.
This scene is involves the mascot being hit by an Indiana Jones style rolling boulder.
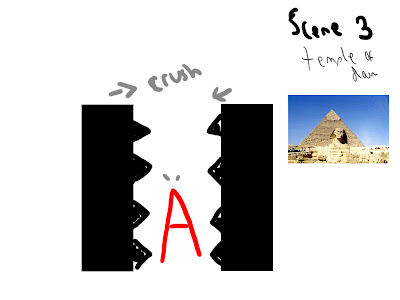
The next image shows my final scene, which involves a mascot to being crushed in ancient Egyptian pyramid trap.
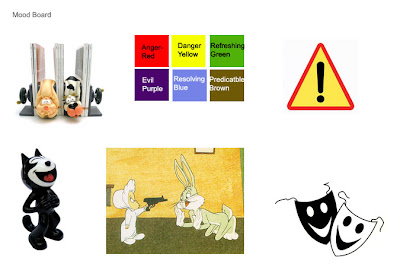
My next image is my mood board, which shows off the mood feelings and sentiments of my animations.
The mood board has a series of images on it. The first image on the top left hand side represents the common cartoon theory that when you squash something it retains its original form, the second image shows off a series of colours and what I imagine they depict on my scenes (Red shows anger, yellow is danger, green shows refreshing [ for something a little different], the purple shows evil [ representing what keeps happening to the mascot], the blue shows resolve, and the brown shows the sense of familiarity).
the warning symbol represents the thrill of danger to all my scenes, whilst the laughing cat shows what the audience's reaction should be, the Bugs Bunny cartoon shows the slapstick cartoon style violence which I will be using, and masks depict the genre of my animations (comedy).

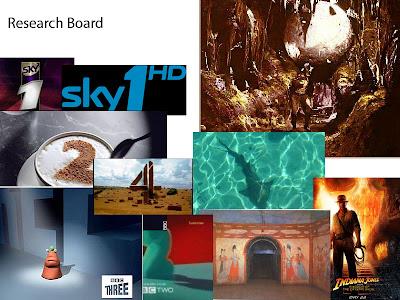
My final image is my research board, depicting what I found that when I looked at various idents, logos, and related areas to watch my TV channel of choice was offering (action).
These boards will help me make my final animations.

Thursday, 5 February 2009

Animation Paths

In todays lecture we learned about creating animation paths which allow objects or cameras to move along.
First we simply started by creating a spherical shape, switching to 2d shapes afterwards and creating a single linear spline. From this, I then clicked on the animation button in the toolbar above the object displays and then chose constraints > path constraints. From here i then dragged my sphere to the line I created, which attached the object to the line (which was now converted to a linear path) and 3dsMax created a series of keyframes for me.
This functionality will be useful later on, as it will allow me to easily create motion between objects, rather than moving objectsd manually frame by frame.
Next we repeated the above process, however instead of connecting the shape to the spline, I added a camera, and attached it to the spline. This made the camera move which gives off the perspective of someone walking through or maybe a vehicle moving through a scene. Whilst we were assigned the task to create a walkthrough house, I had trouble getting the camera to stay looking at the area I wanted. I found that there is a myriad of options which need to be configured to do this, namely the "follow" checkbox on the right. The other options on this panel allow you to add banks, slow the camera down as well as many other complexed functions.
I produced an animtation of a camera roatating arfound a collection of 3d A shapes.

Thursday, 29 January 2009

Animation in 3DsMax

Today, after a fairly long break in 3-D Modelling, I continued learning new techniques.
For this semester, I will need to design three different animated 3-D scenes; which are for a TV channel to use as idents, and must be approximately 30 seconds long - for a TV channel of my choice.
Today we started with simple animations. I drew a sphere, which I was then to animate bouncing up and down. To make the ball(sphere) bounce up and down, firstly I clicked toggle set key mode located at the bottom of the programs main screen. This highlighted the bottom area of the screen in red indicating the timeline. Just above the timeline is a small scrollbar which indicates what frame you are currently on, to animate I simply moved the scroll bar to the fifth frame, and changed the position of the ball. I then went back to the button next to the toggle set key, and pressed the button with a picture of a key on. This indicated to the programme that the keyframe an item had moved to a new position allowing the programme to move the object for me. I repeated this step and created a simple animation in which the ball moved up and down. the next thing I tried creating was again another ball, which I was to animate using a slightly different process. The process I used, involved using the mini curve editor tool. This button can be found on the left-hand of the screen at the start of the timeline. Clicking this brings up a panel in which you can draw a curve graph, which controls the different regions of the ball. Changing the depths of these curves allows the ball to go to different areas. For example the Green line controls the y-axis of the ball. Changing the depths of this line determine whereabouts of the ball in the scene at.
Other tools in this mode allows me to add sound, as well as rotate and freeze objects. This mode is particularly useful as it can be quicker than individually setting keys.
After this I decided I would try a different shape and I created a cube. In this animation the cube multiplies into several cubes. Every 10 frames I added a new cube cloned from the cubes that already exist. These at the end merged into one cube on top of the already existing four cubes. A video of his animation I created is below: